Nemesis Documentation
Thank you for purchasing our theme. If you have any questions regarding our product feel free to visit our support form.
( Don't forget to include your page url so we can see your issue )
Getting Started
Unzip files from archive and you will find following folders and files.
- Licensing
- nemesis.zip - archive with installable WordPress theme
- nemesis-child.zip - archive with child theme
Theme Installation and Demo Import - Video Tutorial
Recommended Plugins
After theme installation you'll see a notification with recommended plugins that you should install if you want to get full functionality of a theme. The most important plugins are highlighted with Required label.
Also if you want to use our theme without importing pre-made demos, but you want to create your own content with existing posts we recommend to use Regenerate Thumbnails Plugin to regenerate images that have been uploaded to your Media Library.
Demo Import
We recommend that you contact your web hosting service provider to make sure that your server PHP configuration limits are as follows:
max_execution_time 300memory_limit 128Mpost_max_size 32Mupload_max_filesize 32M
If you are running dedicated server or VPS, you should check your php.ini file. Alternatively, you can edit .htaccess file in the root of your website and add the following values:
php_value max_execution_time 300php_value memory_limit 128Mphp_value post_max_size 32Mphp_value upload_max_filesize 32M
Go to Appearance -> Import Demo Data. Click Import Demo Data Button and wait until the process is finished.
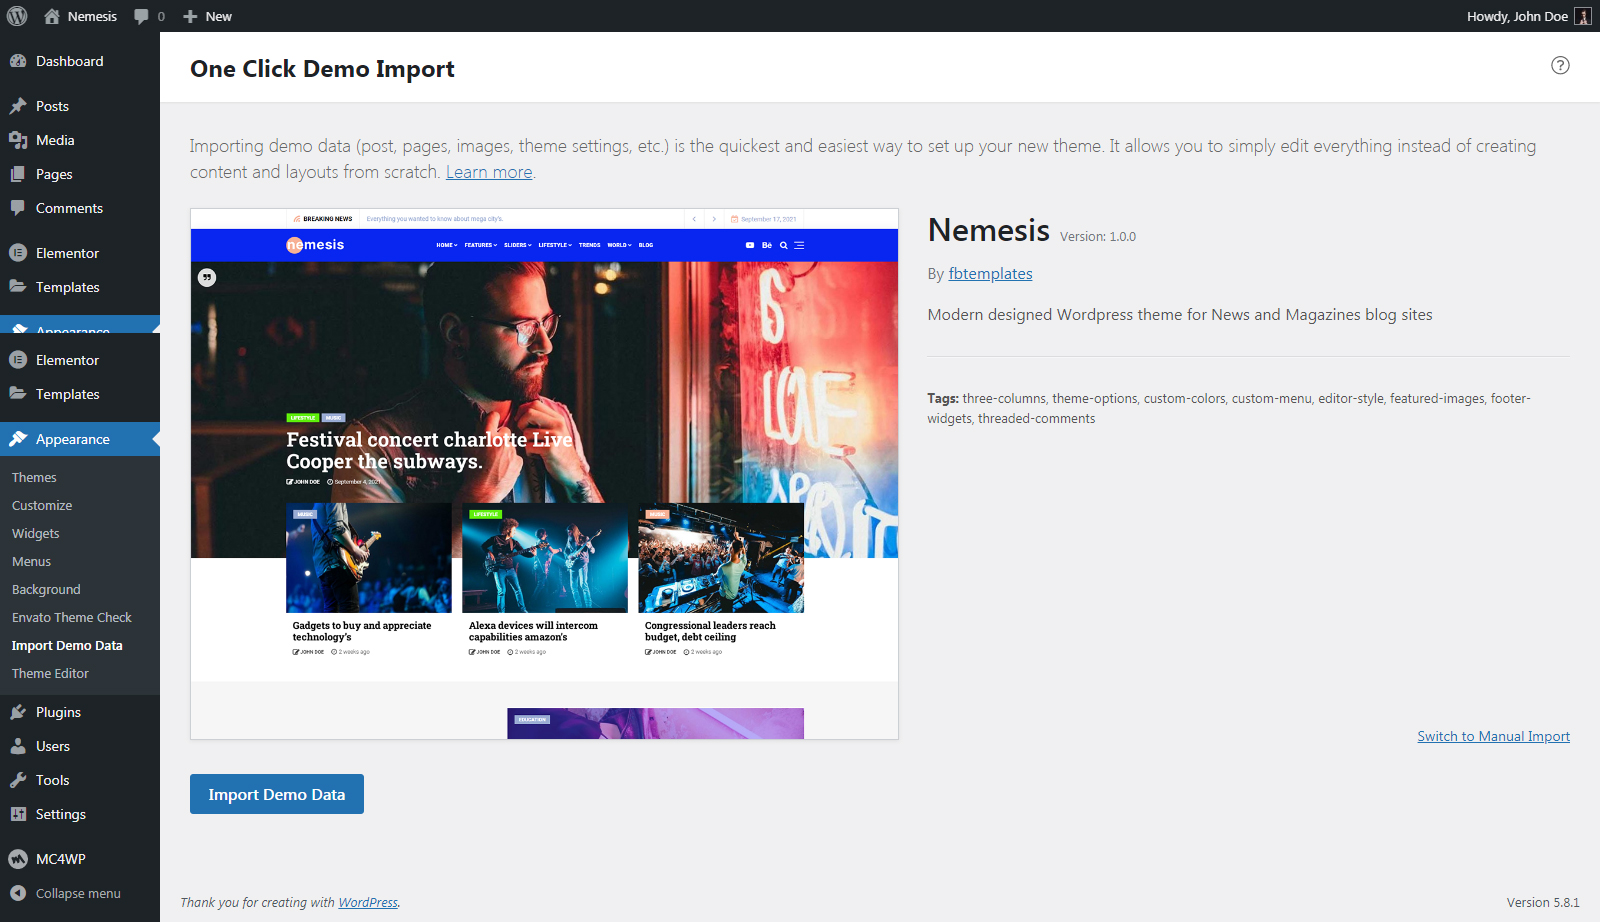
After importing you need to set manualy the homepage and menus.
If you need to import from the begining, you need to have a clear website.
Use Wp Reset Plugin or reset your database or remove all your content manually.
Layout Settings
After importing the Demos or after creating the first page with Elementor, you need to set the Layout width and Breakpoints in Elementor Menu
- Press the Menu Icon on Elementor Menu
- Site Settings -> Layout
- Content Width (1170px for Desktop Devices - 991px for Tablets - 767px for mobiles)
- Breakpoints (Mobile 991px and let as is the Tablet Breakpoint)
- Update and you are Done
Watch the video tutorial for this setting: www.youtube.com
Child Theme
We recommend you to use child theme. You can customize it how you want, add css styles, functions etc. This way, when you get theme update, all your changes will be in place in child theme. Simply install and activate it after main theme.
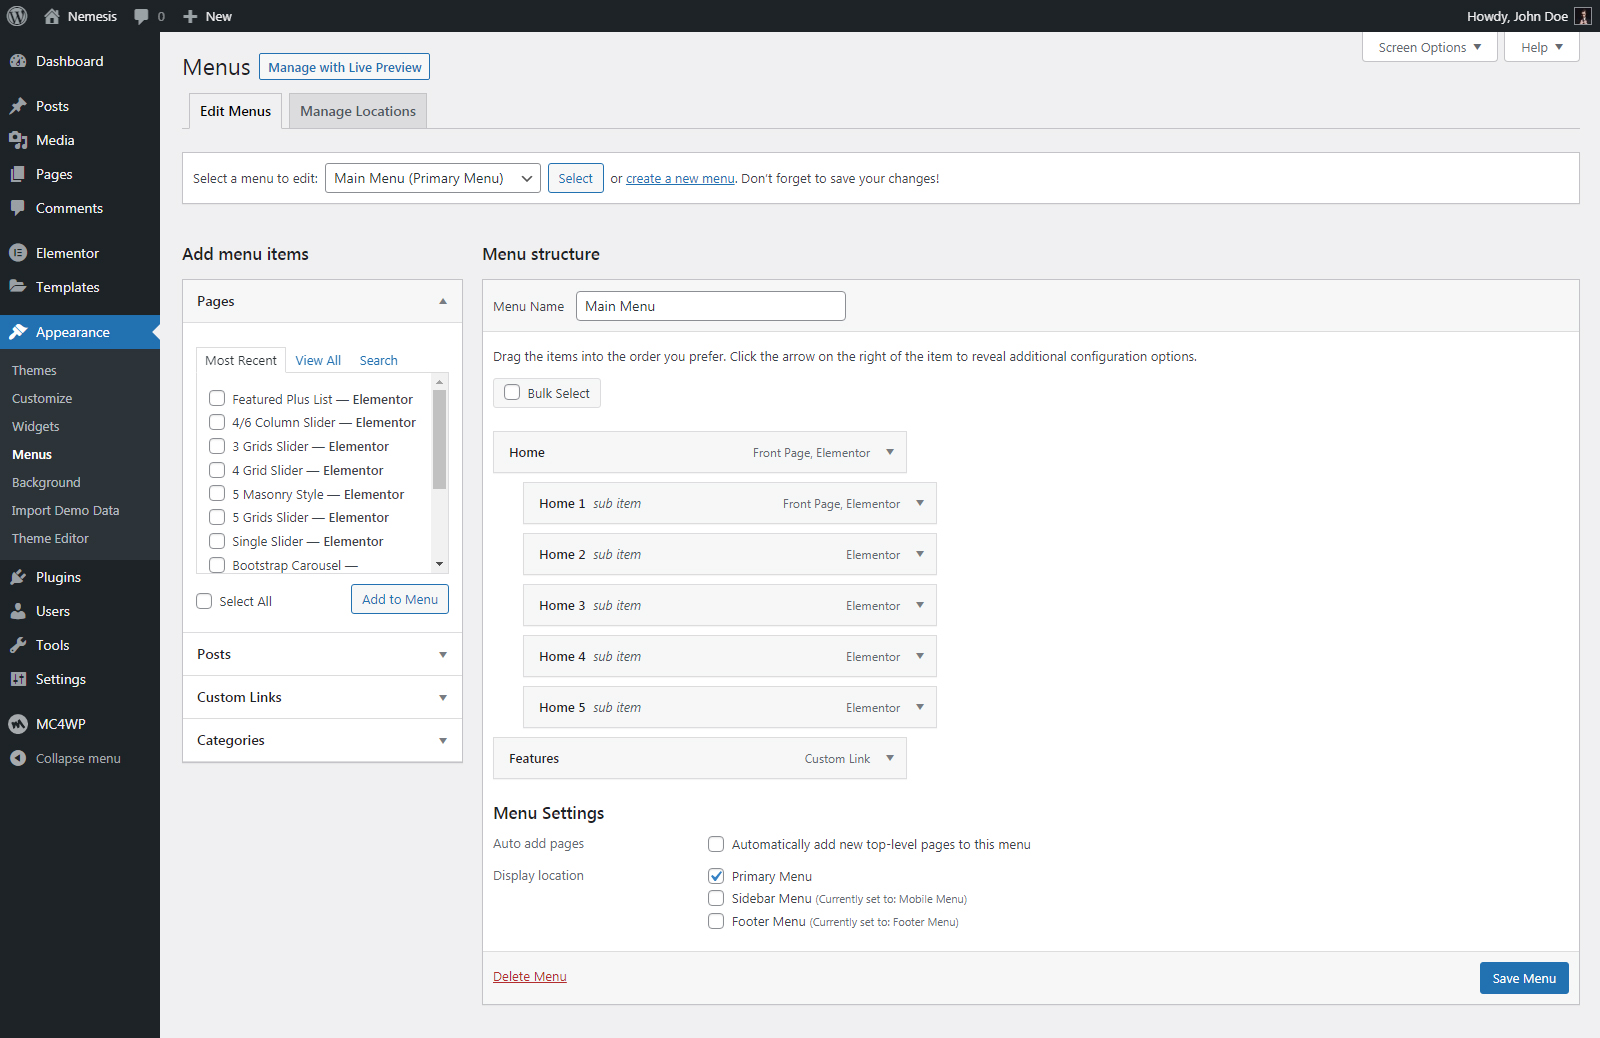
Theme Menu
Go to Appearance -> Menus. Make sure that Main Menu and Display location are set to Main Menu
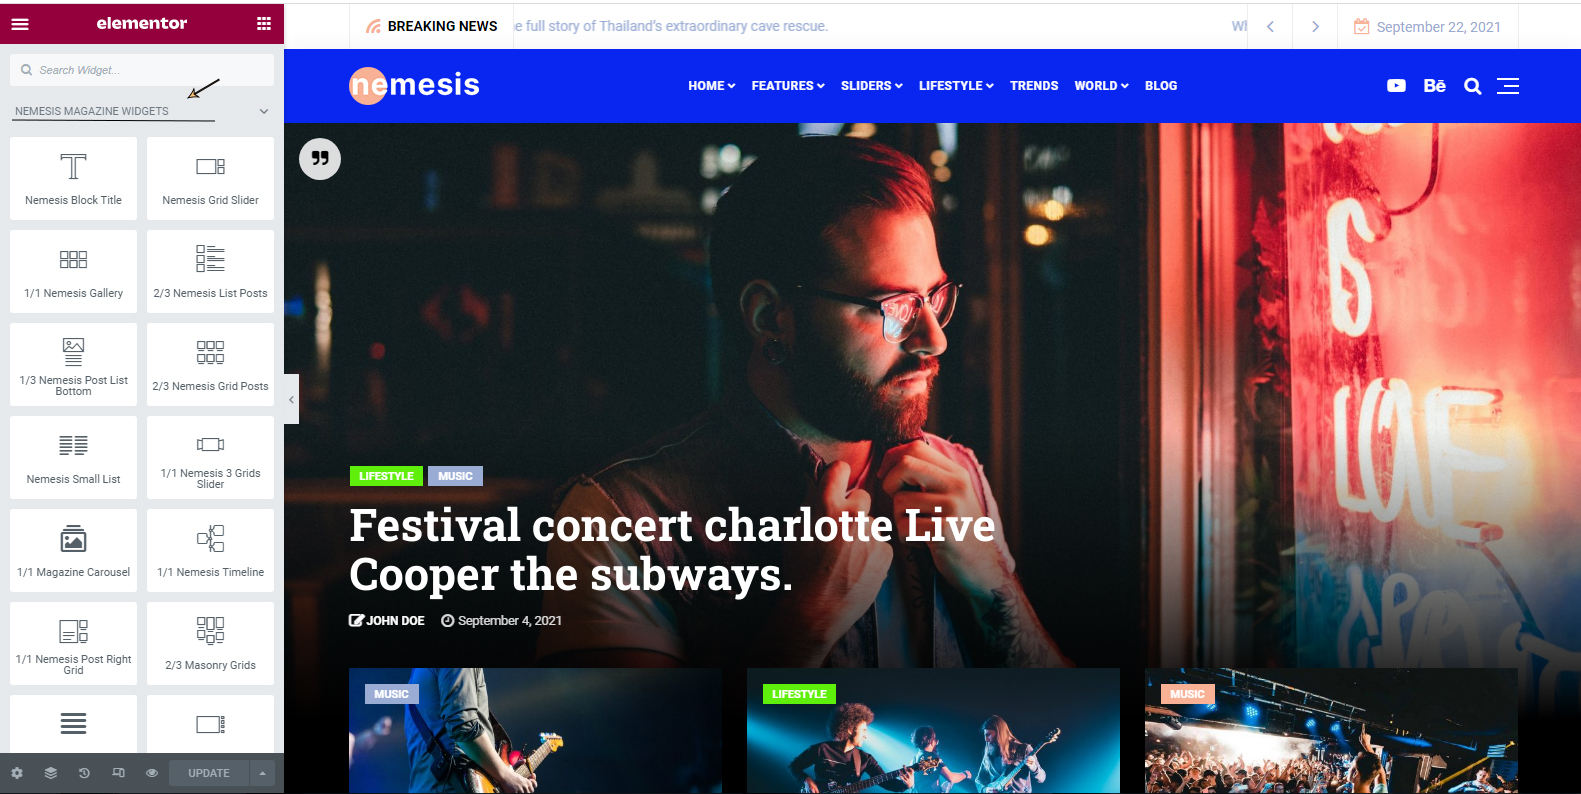
Elementor Custom Widgets
We've created custom widgets for Elementor. You'll find them under the general widget section. To get started simply Drag n Drop them into a page layout.
Create Pages With Elementor - Video Tutorial
Header Customization - Upload Logo
- Go to Appearance -> and click on (Customize)
- Click on
Nemesis General Options->Header Logo-> Upload your Logo- Select image for your logo
- In the same way you need to select a logo for your scrolling navbar in Scrolling Header section
- Recommended also to upload it the Light Logo in case you use it for Dark Mode Option or Transparent Header
Also you can customize all navbar section (Colors, Menu typography, Logo width, Navbar margin top, etc...)
- Click on
Nemesis General Options->Footer Logo-> Upload your Logo- Select image for your logo
Select Header Style (new option)
Now you can select a header for your site.
- Go to Appearance -> and click on (Customize)
- Click on
Nemesis General Options->Header - Select Header Layout
- Select your style and save
You can use this option separately in your posts and pages
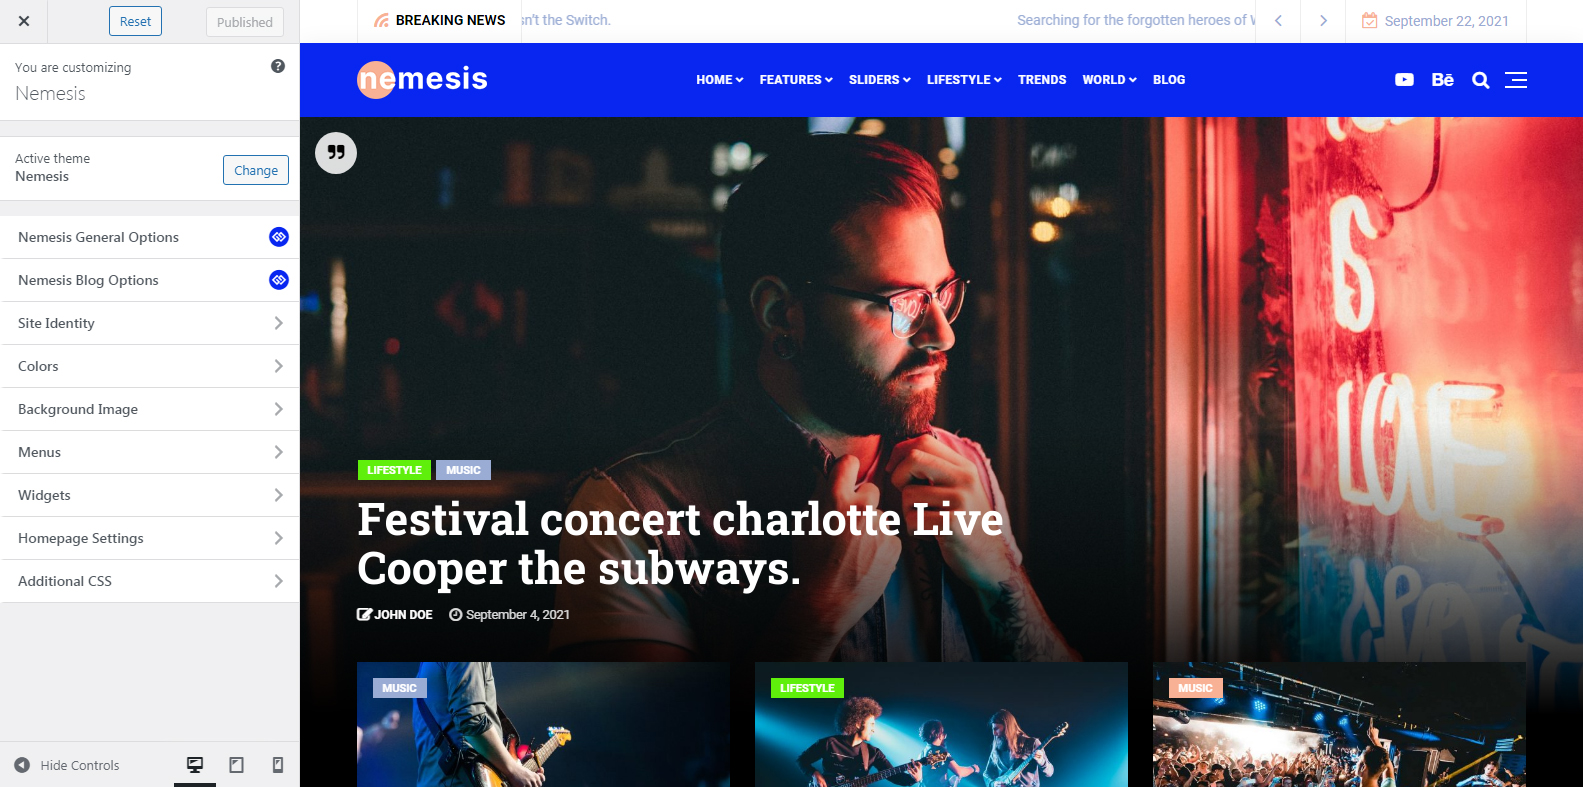
Customizer
- Go to Appearance -> and click on (Customize)
- Click on
Nemesis General Options or Nemesis Blog Options or Colors - Select the section you need to customize
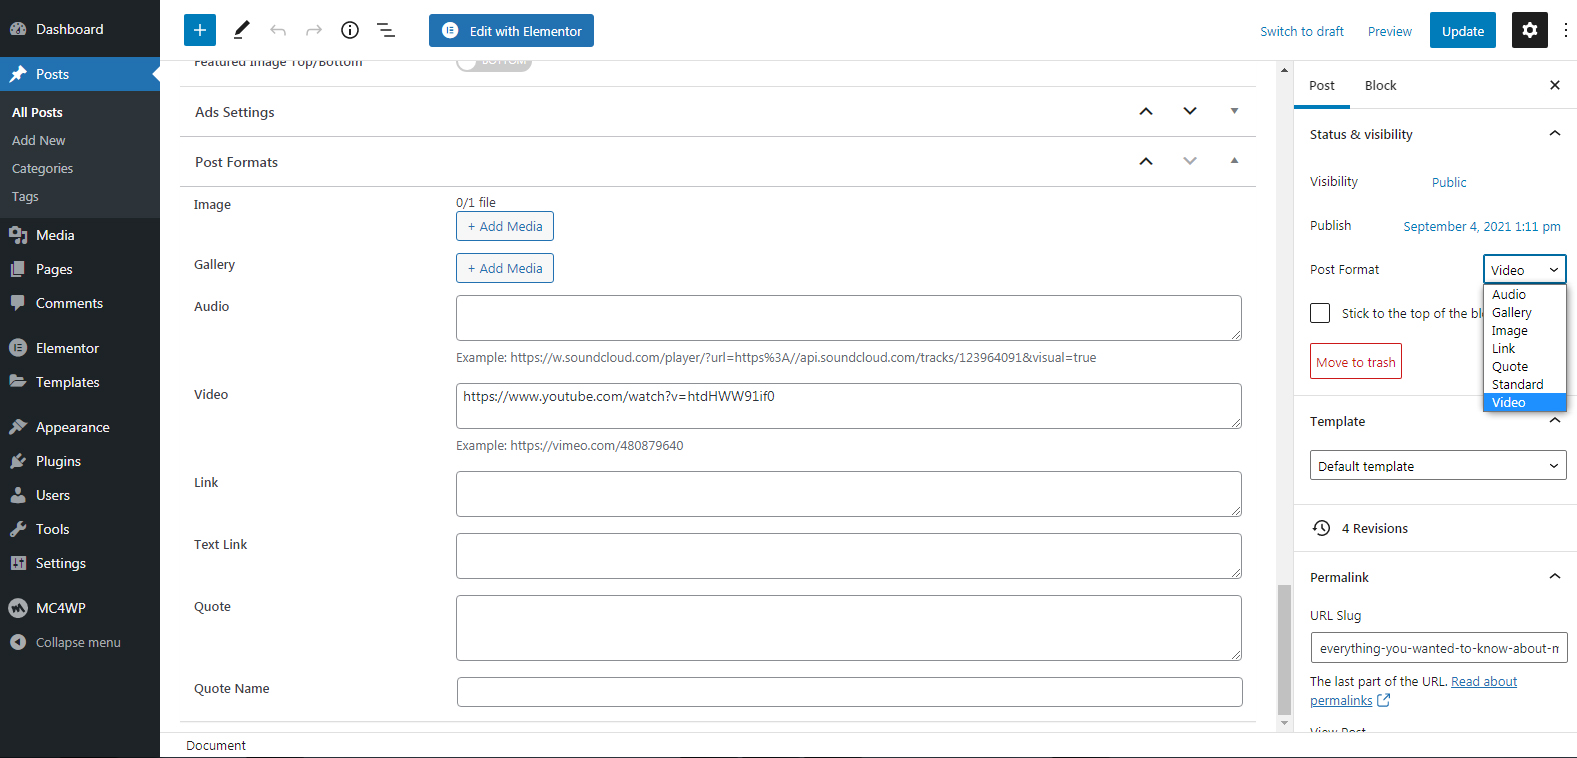
Post Formats
- Go to Posts -> Add New or Edit
- choose post format (standard, gallery, quote, video, audio, link, image)
- On section post format will display options depend on post format you choose
Also from this section you can control the post width if you need to be in the same width with container.
Post Layouts
- Go to Posts -> Add New or Edit
- choose at the bottom of editor posts, Post Layout
- Add your overlay to the Featured Image (Optional)
- Select your post style instead 4 STYLES
- Select the place of featured Image (Top/Bottom)
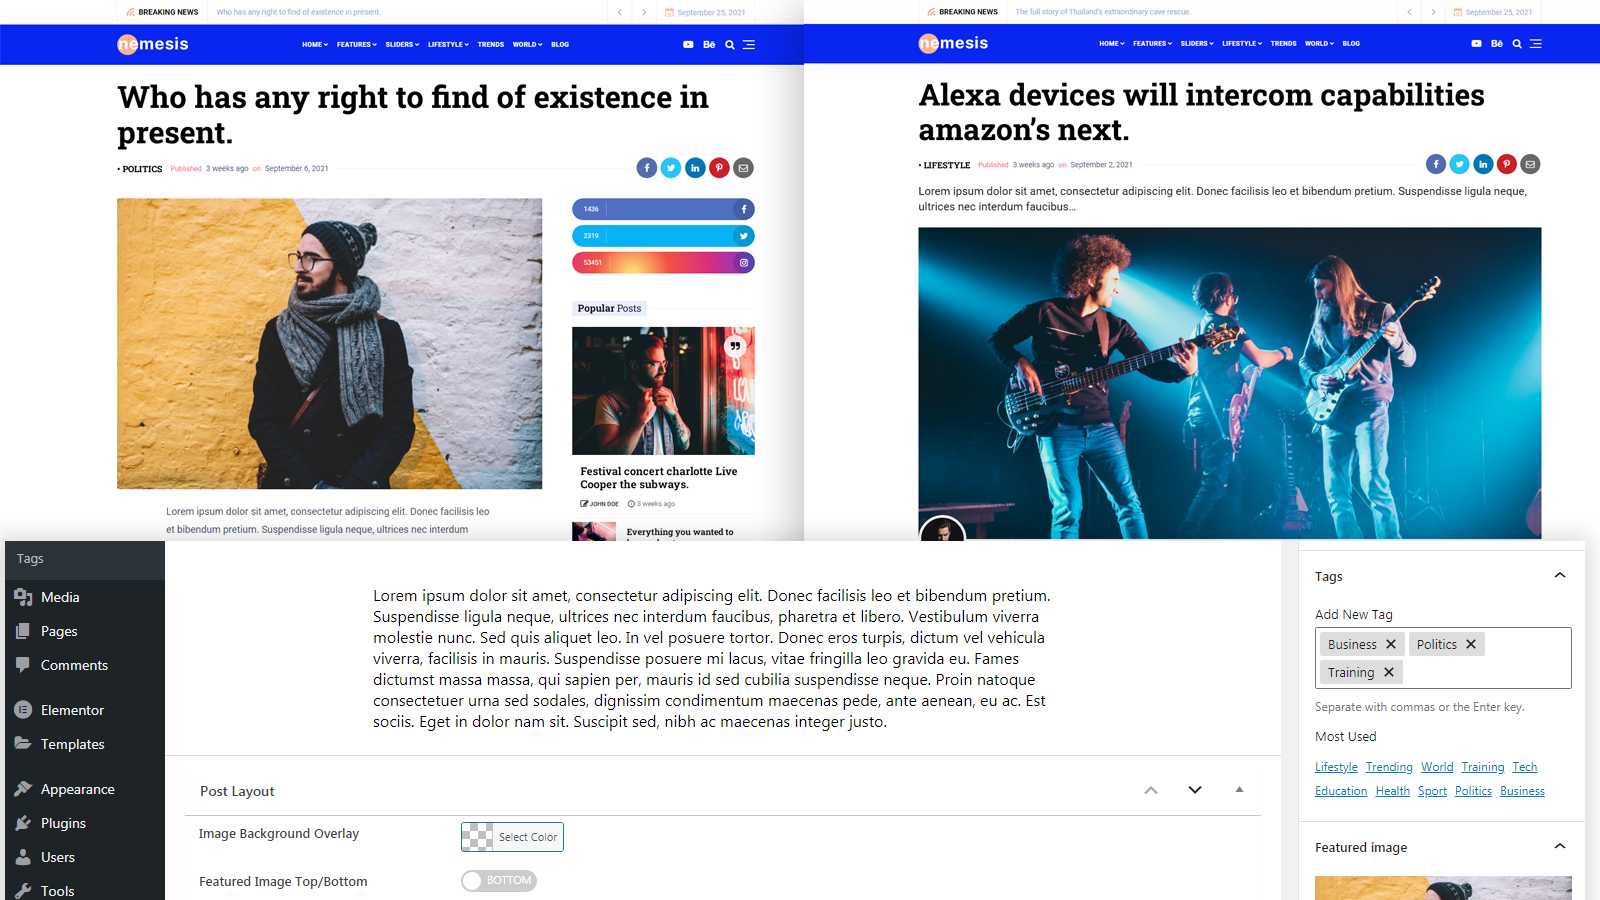
NOTE: In the Latest Updates you can select the post style you want as default from Theme Customizer
Go to: Appearance -> Customize -> Nemesis General Options -> Post Options -> Select Post Style
In this section you can display BREADCRUMBS on the top of the single post instead of the Categories
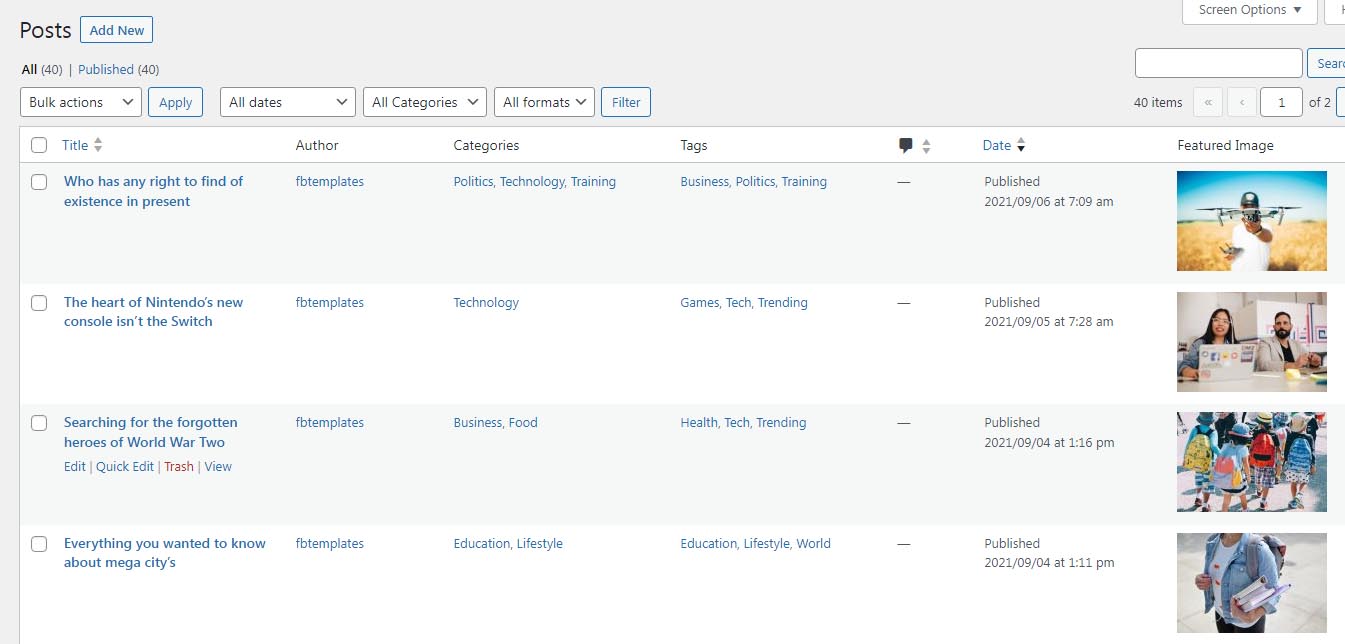
Admin Posts
Now you can display the Featured Image on Admin Posts
Go to: Appearance -> Customize -> Nemesis General Options -> Post Options -> Admin Posts Options -> Add Thumbnail to Admin Posts and Publish
Copyrights & Social Links
- Go to Appearance -> and click on (Customize)
- Click on
Nemesis General Options - Footer /
Footer Social Iconsand paste your URL to appear the social button need to use - Copyrights to add your credits in your site
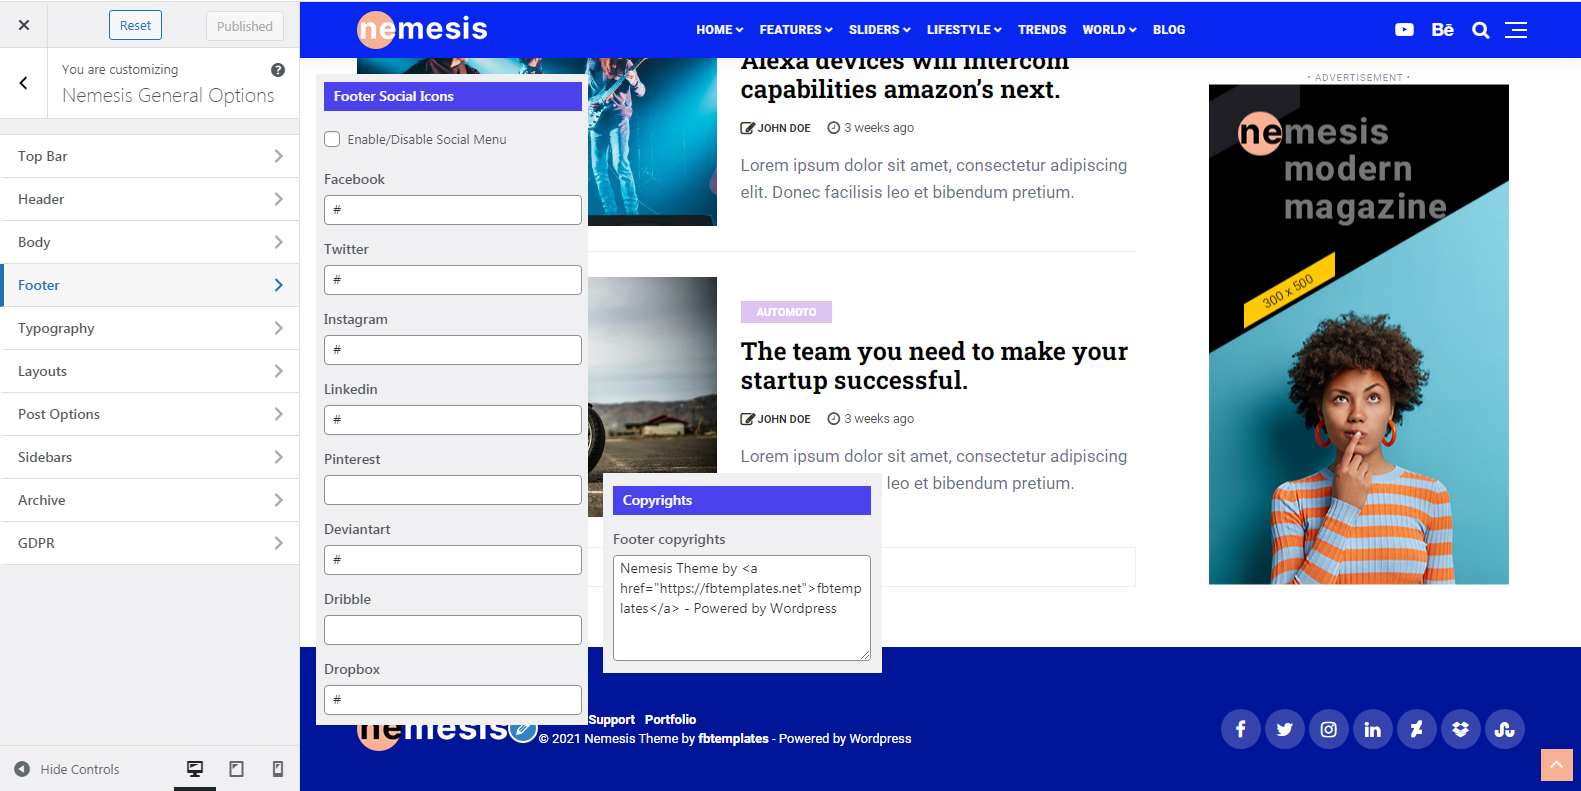
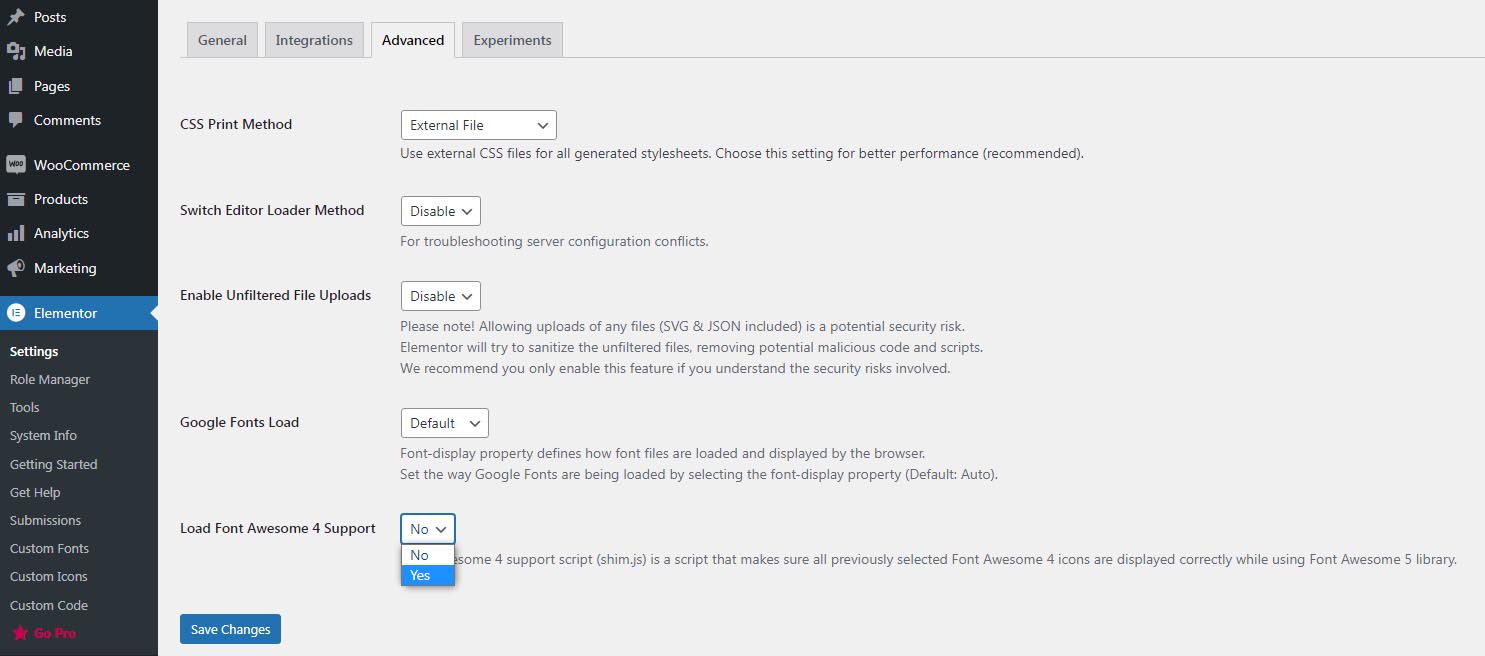
NOTE: Some demos do not display the FontAwesome icons. Press Elementor / Settings / Advanced / Load Font Awesome 4 Support / select Yes and Save Changes
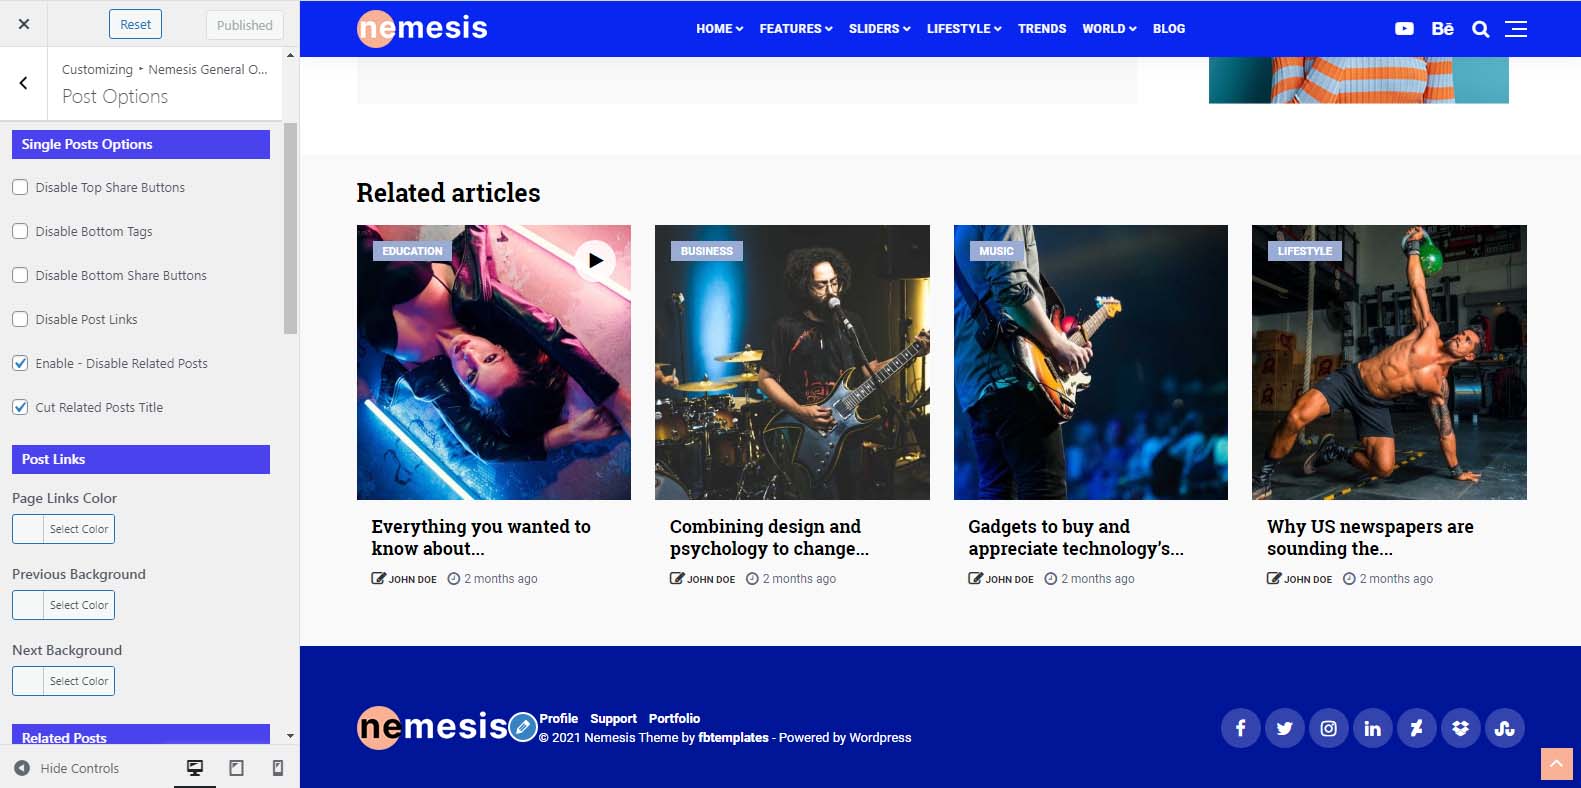
Related Posts
- Go to Appearance -> and click on (Customize)
- Click on
Nemesis General Options - Post Options /
Single Posts Optionsand check the checkbox Enable - Disable Related Posts - If you want you can cut the titles with checkbox below
Theme Translation
To translate the theme you can use translation software such as PoEdit or Easy Po.
Theme Update
There are 2 options of how to update your theme.
-
Option 1 (automatic):
Install Envato Market plugin. Generate an Envato API Personal Token, paste the token and save changes. When the theme has new update, you will see the notification and can update it on the fly. Read more about how this process works at envato.com
-
Option 2 (manual):
Activate other WordPress theme (ex.: Twenty Twenty One). Delete current theme. Upload new version of current theme.
Contact Form
First, make sure that you have installed Contact Form 7 plugin. After this go to Contact -> Contact Forms and select Contact form 1. Here is the code reference for the contact form.
Mailchimp Newsletter
First, make sure that you have installed MailChimp for WordPress plugin. After this go to MailChimp for WP and enter your API key from MailChimp, click on the Get Your API key link if you need to create new API key.
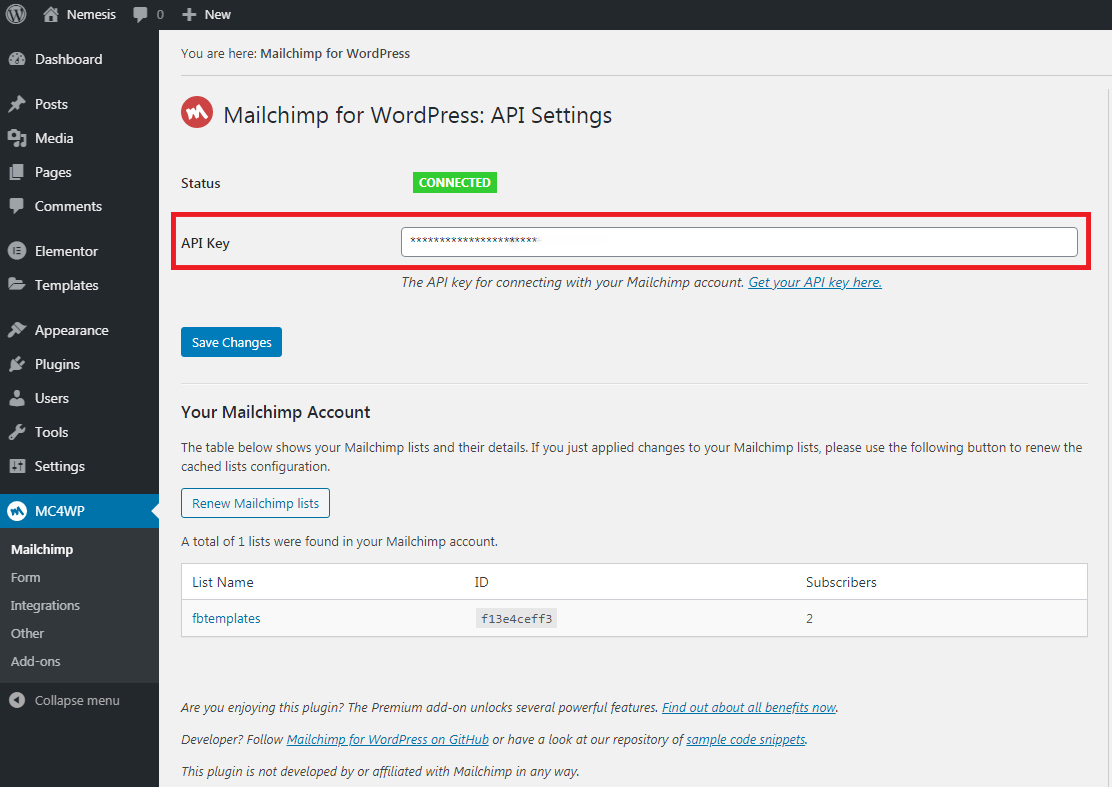
For installing default form go to MC4WP -> Form -> paste the code below -> Save Changes
Header & Footer Ads
Hover Options
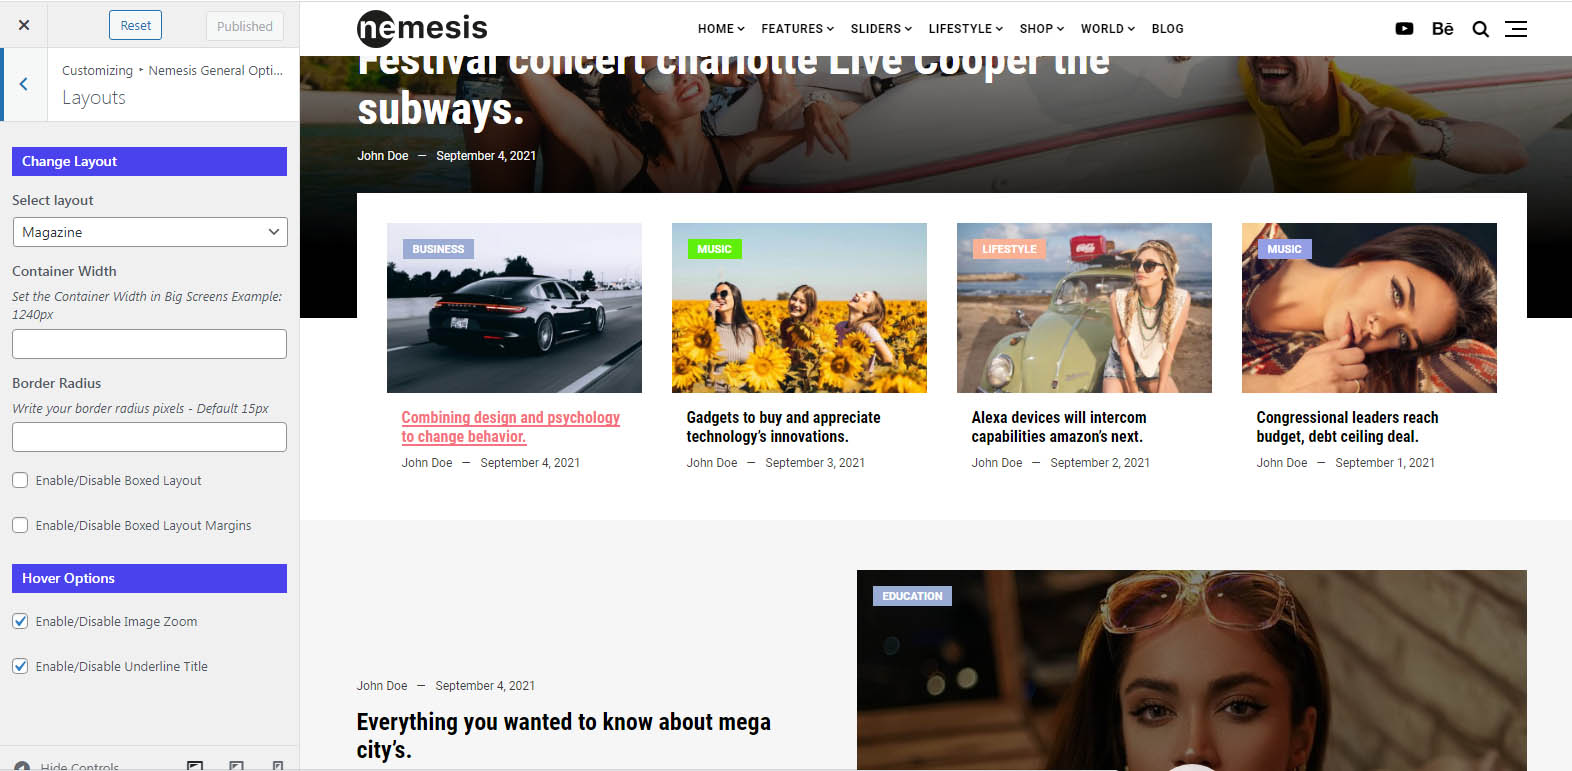
- Go to Appearance -> and click on (Customize)
- Click on
Nemesis General Options->Layouts - Check Enable/Disable Image Zoom (to disable the image zoom on hover)
- Check Enable/Disable Underline Title (to enable the underline option on hover for titles)
- Save your changes
Dark Mode
- Go to Appearance -> and click on (Customize)
- Click on
Nemesis General Options->Day - Night Mode - Check Enable/Disable Day - Night
- Save your changes
Classic Widgets
- Go to Appearance -> and click on (Customize)
- Click on
Nemesis General Options->Sidebars - Check Enable/Disable Classic Widgets
- Save your changes
Credits
Support
If you have any question feel free to visit our Support Form
Don't forget to write your website URL.